tigerexped GmbH & Co. KG

By selecting "Accept all", you give us permission to use the following services on our website: Strictly necessary cookies, YouTube, Microsoft Clarity, ReCaptcha, Matomo web analytics, Brevo. You can change the settings at any time (fingerprint icon in the bottom left corner). For further details, please see Individual configuration and our Privacy notice.
Legals/Imprint | Privacy PolicyThe settings you specify here are stored in the "local storage" of your device. The settings will be remembered for the next time you visit our online shop. You can change these settings at any time (fingerprint icon in the bottom left corner).
For more information on cookie lifetime and required essential cookies, please see the Privacy notice.
Strictly necessary cookies are those that enable the basic functions of a website. Without them, the website will not work properly.
To view YouTube contents on this website, you need to consent to the transfer of data and storage of third-party cookies by YouTube (Google). This allows us to improve your user experience and to make our website better and more interesting. Without your consent, no data will be transferred to YouTube. However, you will also not be able to use the YouTube services on this website.
Embedding videos
Processing company:Google Inc.
Terms of use: https://policies.google.com/privacy?hl=enBy using Clarity, we receive detailed information about how visitors interact with our website. The tool enables the recording of user interactions, heatmaps to visualize clicks and mouse movements, and the analysis of website performance metrics. Our goal in using Microsoft Clarity is to gain data-driven insights about the user experience on our website. These insights help us identify vulnerabilities, better understand user behavior and make optimizations to improve the usability and effectiveness of our website.
Optimizations, Analysis
Processing company:Microsoft Corporation
Terms of use: https://privacy.microsoft.com/en-us/privacystatementTo submit forms on this page, you need to consent to the transfer of data and storage of third-party cookies by Google. With your consent, reCAPTCHA, a Google service to avoid spam messages via contact forms, will be embedded. This service allows us to provide our customers with a safe way to contact us via online forms. At the same time, the service prevents spam bots from compromising our services. After you gave your permission, you might be asked to answer a security prompt to send the form. If you do not consent, unfortunately you cannot use the form. Please contact us in a different way.
Stopping spam bots
Processing company:Google Inc.
Terms of use: https://policies.google.com/privacyMatomo is our self-hosted web analytics (server in Germany, hosted by netcup GmbH). With your consent, page views, referrers, device information as well as cart and orders are recorded for statistics (cookies _pk_id 13 months, _pk_ses 30 minutes, _pk_ref 6 months). IP addresses are truncated; the data is not shared with third parties. Withdraw at any time via the cookie settings.
Audience measurement and e-commerce statistics
Processing company:tigerexped GmbH & Co. KG (Matomo selbst betrieben auf analytics.tigerexped.de, Hosting: netcup GmbH)
Terms of use: https://www.tigerexped.de/privacy-policyTo send data to Brevo, you need to consent to the transfer of data and storage of third-party cookies by Brevo. This allows us to improve your user experience and to make our website better and more interesting.
Brevo Automation Tracking
Processing company:sendinblue
Terms of use: https://sendinblue.com/legal/privacypolicy/Would you like to see these contents? Activate the desired contents for one session only or allow the website to remember these settings. Once you have given your consent, the third-party data can be loaded. For this, third-party cookies might be stored on your device. You can change these settings at any time (fingerprint icon in the bottom left corner). For further details, please see the Privacy notice.
Queensize Camper taps, sinks and showers not only stand out for their aesthetics and functionality, but also for their ease of maintenance. Many components can be cleaned, adjusted or replaced in just a few simple steps when required.
On this page, you will find practical frost protection tips, help with leaks and reduced water flow, as well as instructions for maintaining and repairing your Queensize Camper products.
Even small amounts of residual water can damage seals, cartridges or other components when they freeze. Taps, showers and water lines should therefore be drained completely before winter storage or whenever freezing temperatures are expected.
Simply draining the water may not be sufficient for taps fitted with a non-return valve. The lines should therefore also be blown out from the pump side or vacuumed out in the opposite direction.
Queensize Camper cold-water taps and older hot-water taps are fitted with a non-return valve. These taps must therefore be blown out from the pump side.
The lines can be blown out by mouth if, for example, a hose can be connected near the pump or at a low point in the water system.
Alternatively, a wet vacuum cleaner can be used. In this case, the water is extracted from the system in the opposite direction.
To make winter draining particularly easy, you can install a permanent connection point in your water system:
The non-return valve is located beneath the brass hose barb on the connection hose. As a rule, it is no longer fitted to Queensize Camper hot-water taps purchased from 2024 onwards. With older models, it should be checked if you are unsure.
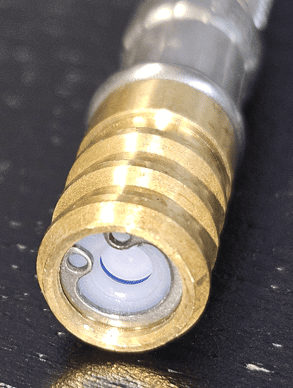
For Queensize Camper showers, the manufacturer recommends the following procedure:
During winter, hang the shower hose as straight as possible along its full length. If it is hung in a loop or stored lying down, residual water may collect in the lower sections and freeze.
If freezing temperatures arrived unexpectedly, seals or, in more severe cases, mixer cartridges may have been damaged. Many of these spare parts are easy to replace and cost considerably less than a completely new tap. Frost damage may look like this:
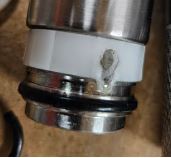
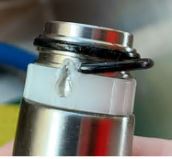
The repair kit is suitable for Queensize Camper hot- and cold-water taps, including both surface-mounted and recessed versions.
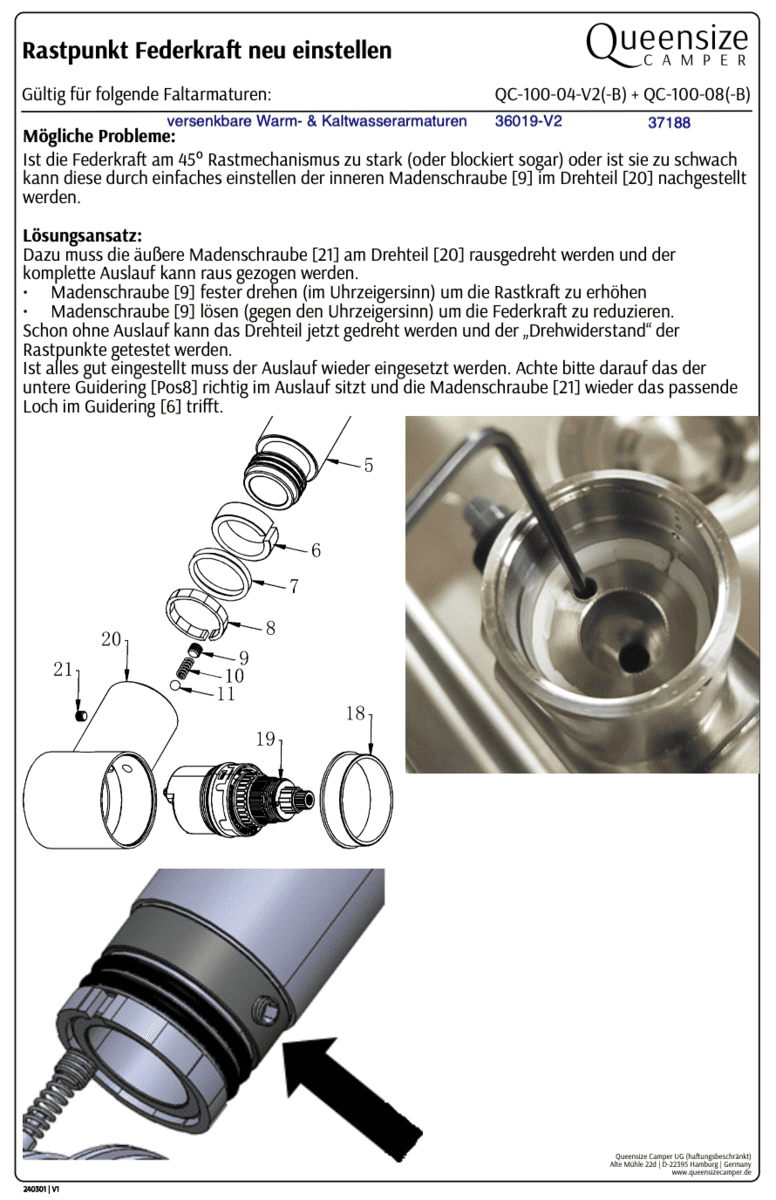
During the repair, the damaged components on the spout are replaced and then secured again using the grub screw [21].
The complete tap only needs to be replaced if the spout continues to leak after the repair or if the thread on the swivel part [20] has been damaged too severely. This is rare and is normally only necessary in cases of particularly severe frost damage.
Newer taps and frost repair kits have a shorter grub screw and a shallower blind hole in the white guide ring. This prevents the screw from working its way through the metal as easily and causing further damage.
If the guide ring has nevertheless been damaged, it may be possible to turn it over once and continue using it, depending on the type of damage.
In some cases, the mixer cartridge may also be affected. Taps and showers require different replacement cartridges.
The following sections explain how to remove, clean or replace the relevant cartridge.
If water escapes behind the handle of your Queensize Camper folding tap or the water flow decreases over time, the cartridge should be checked.
In the event of a leak, the cartridge may no longer be seated correctly inside the housing because the cartridge retaining nut has come loose. Alternatively, the cartridge may have been damaged by frost or another cause.
If the water flow is reduced, the strainers on the rear of the cartridge or the aerator on the spout may be dirty.
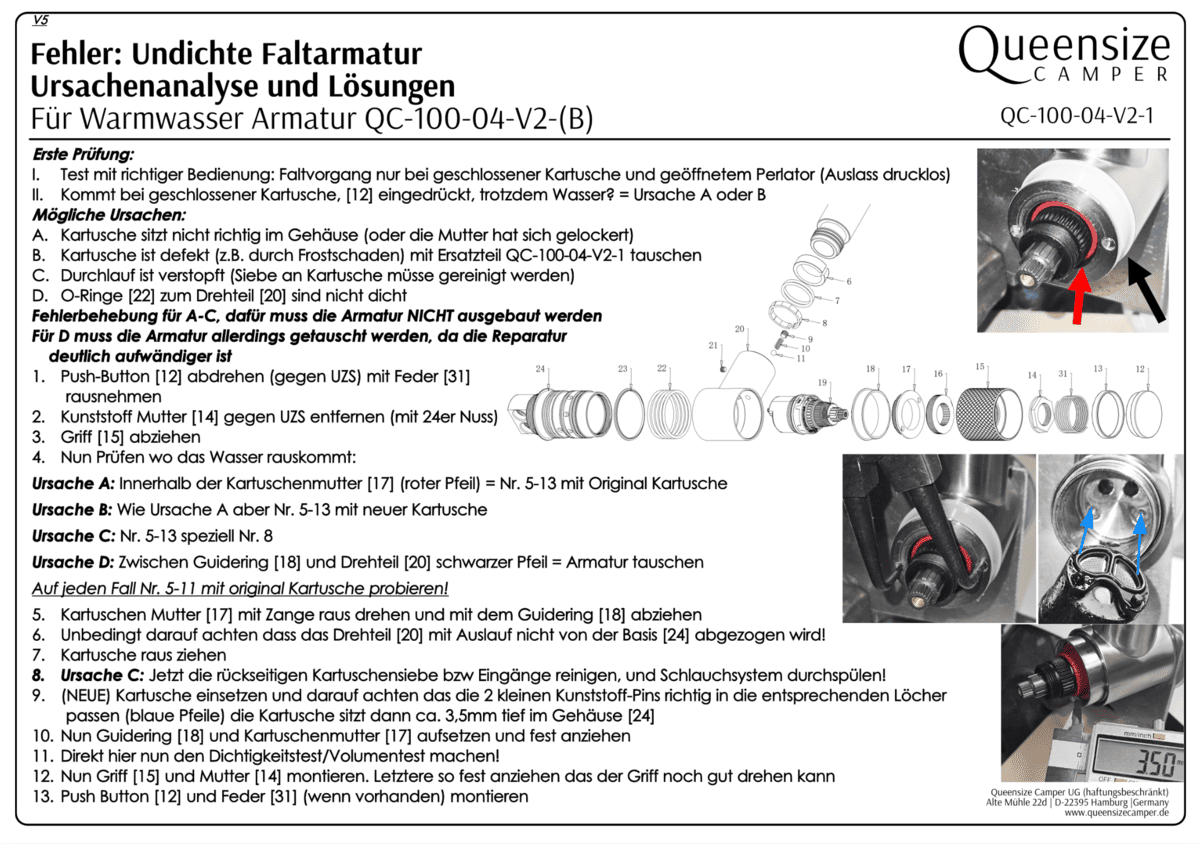
During this repair, the swivel part [20] together with the spout must not be pulled away from the base [23].
Do not only clean the strainers on the cartridge. Where fitted, also unscrew the aerator from the spout and remove any deposits or dirt.
Queensize Camper folding taps can be folded away when they are not required and the sink needs to be covered. Depending on how frequently the tap is moved, the detent position and spring tension may change over time.
If the spring tension in the 45-degree detent mechanism is too strong and causes the tap to jam, or if the holding force is too weak, it can be adjusted using the internal grub screw [9] in the swivel part [20].
The swivel part can then be moved even without the spout inserted. This allows you to check the resistance of the individual detent positions directly.
Make sure that the lower guide ring [8] is seated correctly in the spout and that the outer grub screw [21] engages with the correct hole in the guide ring [6].
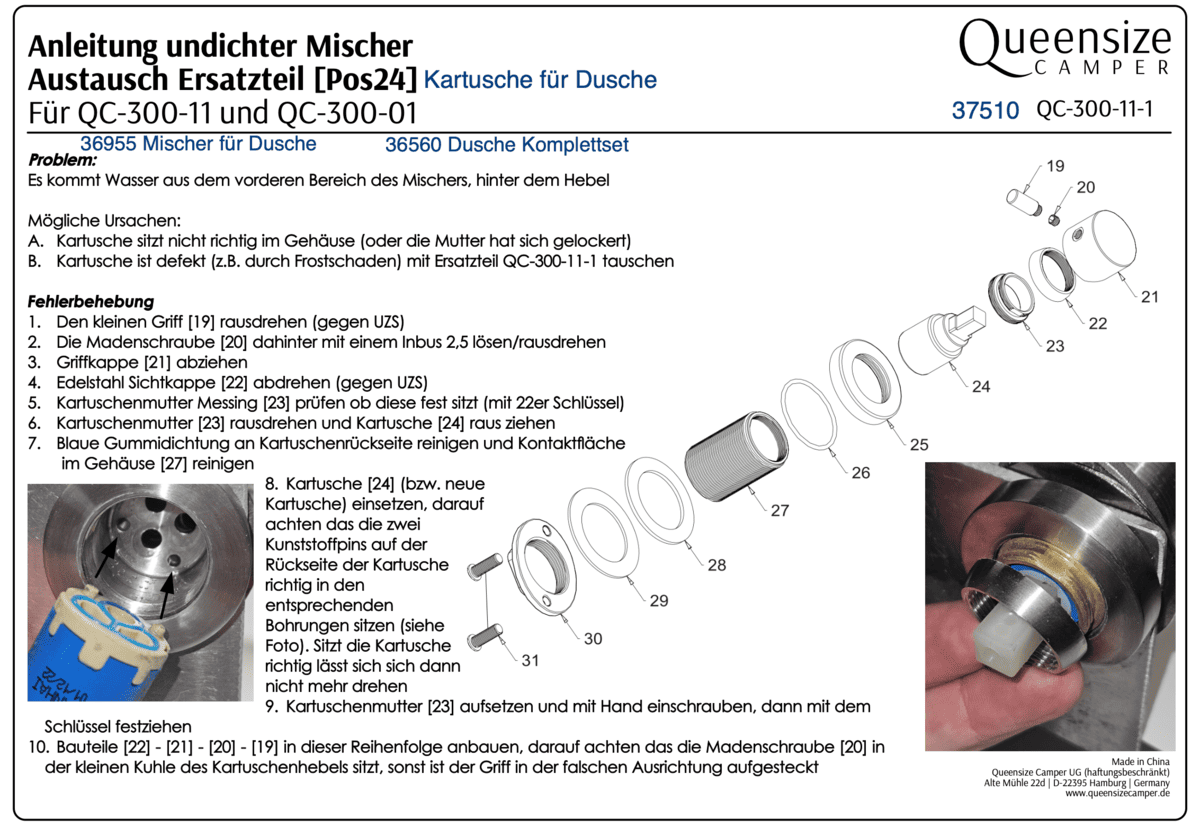
If water escapes behind the lever at the front of the shower mixer, the mixer cartridge may no longer be seated correctly inside the housing or may have been damaged by frost or another cause.
The grub screw [20] must sit inside the small recess in the cartridge lever. Otherwise, the handle has been fitted in the wrong orientation.
Compact packing and installation dimensions are particularly important in many camper conversions. Queensize Camper therefore developed solutions at an early stage that make it possible to install sink drains with a particularly low profile and minimal space requirements.
Current Queensize Camper sinks are already supplied with a low-profile drain set. This can be used together with the optionally available Queensize Camper trap .
A separate conversion kit for the low-profile, space-saving drain version is no longer required for current sinks. It was only necessary for first-generation Queensize Camper sinks.
The trap is fully compatible with the low-profile drain sets commonly used today. However, it cannot be installed directly on first-generation drain sets because they used a different hollow screw.
Suitable conversion components are available for older sinks. Please contact our support team with your complete customer details and ask for the conversion kit with item number 37767.