Auxiliary diesel heater for Land Rover Defender
Complete installation kit for the Autoterm Air 2D in the Land Rover Defender.
Key advantages
- Complete kit for installing the Autoterm Air 2D in the Land Rover Defender
- Includes cubby box riser, mounting plate and vehicle-specific fuel pickup
- Designed for installation without a high-end workshop setup
- Fuel pickup installation without removing the tank on suitable vehicles
- Altitude kit included for reliable operation at high elevations
- E-mark certified: can be installed without TÜV approval
With this installation kit for the Autoterm Air 2D, formerly known as Planar 2D, you get everything required to install an auxiliary diesel heater in your Land Rover Defender.
To make retrofitting as straightforward as possible, we have put together a kit that can be installed cleanly without a high-end workshop setup. It consists of a cubby box riser with all required openings for the Autoterm Air 2D warm air outlets and a panel with a mounting position for your chosen control unit.
The kit also includes a mounting plate with openings for combustion air intake, exhaust pipe and fuel line. A vehicle-specific fuel pickup is included as well, so the tank does not need to be removed.
Important: The included fuel pickup is only suitable for vehicles without an auxiliary through-flow tank in the rear right wheel arch.
Installing the cubby box riser
For installation, simply remove your cubby box and the original cubby box base plate. Our mounting plate fits directly onto the original mounting holes.
The heater and cubby box riser are then fixed to this plate. Your original cubby box is mounted back on top as the final step.
Installing the fuel pickup and wiring
The fuel pickup installation is also kept straightforward: you only need to loosen the filler neck from the original tank and shorten it by one section.
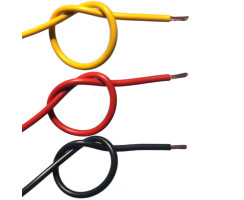
The shortened section is replaced with the supplied adapter and then reconnected to the filler neck. The final step is wiring the electrical system – all required components are included in the kit.
Altitude kit and heater maintenance
The heater is equipped with an altitude kit. Our own tests up to 3440 m were completed without issues; up to approx. 4000 m we do not expect any major problems. The software itself calculates up to 5000 m.
However, this does not mean that the heater cannot build up soot. After leaving high-altitude regions, operate the heater at full output for around one hour so that deposits can burn off.
This burn-off procedure is also necessary if the heater has been operated only at its lowest output for an extended period. Run it at full power at least every 1–2 weeks so the combustion chamber can reach proper temperature again. This is the most important regular maintenance measure for the heater.
The heater is designed for continuous operation. This means it does not need to be switched off all the time, but can continue running at a low output level. Maintaining the interior at the desired temperature usually requires significantly less energy than heating up a cold interior within a short time.
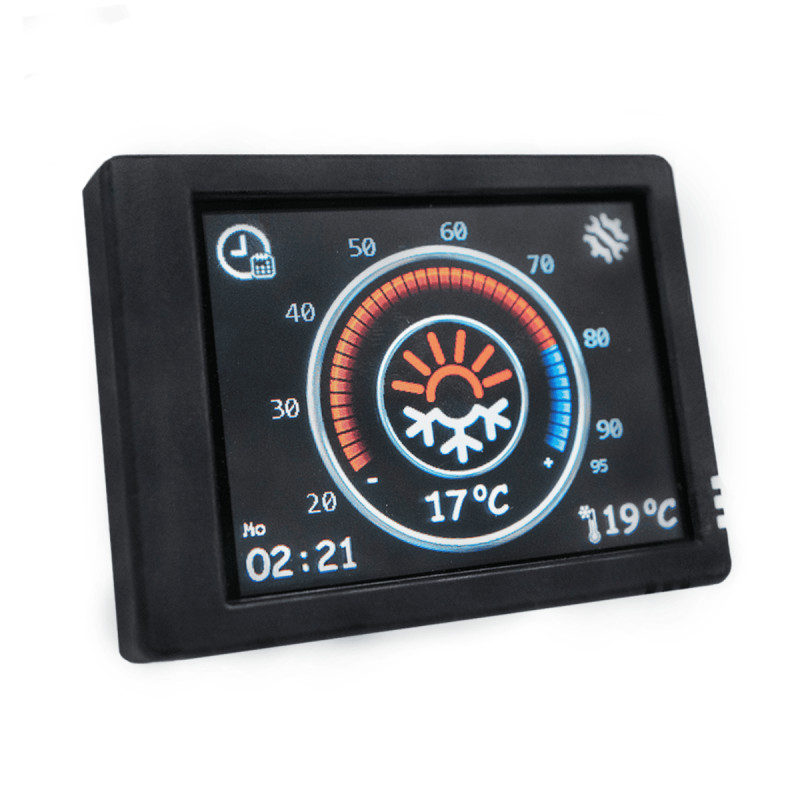
Control units and operation
A control unit is included in the scope of delivery. You can currently choose between the following options:
Comfort Control
Control unit with multifunction rotary knob and display: simple operation, timer function, voltage display and thermostat mode. The proven all-rounder also includes a burn-off reminder and voltage monitoring, which can actively shut down the heater to protect the leisure battery.

Touch Control
Modern touch control unit with a clear menu structure. Ideal if you prefer particularly comfortable and intuitive operation and want to keep system information directly in view.
E-mark certification
All Autoterm heaters are E-mark certified (e2) and can therefore be installed without TÜV approval. The mounting hole pattern corresponds to that of well-known heaters from Eberspächer and Webasto.
Technical data
- Supply voltage: 12 V
- Heating output: 0.8 kW min. / 1.8 kW max.
- Airflow: 34 m³/h min. / 75 m³/h max.
- Fuel consumption: 0.1 l/h min. / 0.24 l/h max.
- Power consumption: 10 W min. / 29 W max.
- Warm air ducting: 60 mm system
Heater scope of delivery
- 12 V heater unit
- Control unit depending on selection
- “Thomas Magnet P0636” metering pump
- Exhaust silencer (17 × 9 × 5 cm)
- Rubber holder for metering pump
- Metering pump wiring harness
- Heater wiring harness
- Combustion air intake hose with integrated silencer
- Heat protection hose
- Exhaust pipe end piece + clamp
- Fuel pickup pipe
- 5.5 m fuel line
- 300 mm fuel line connector
- 1 m metal exhaust corrugated pipe
- Screws, nuts, clamps, heat-shrink tubing and cable ties
- Operating manual
Additionally included in the Defender kit
- 0.3 m warm air ducting
- Webasto air outlet
- Cubby box riser
- Mounting plate
- Fuel pickup for Land Rover Defender 90 / 110 / 130 Td5 2.5, Td4 2.4 and Td4 2.2
Air 2D dimensions
- Length: 33 cm
- Height: 12 cm + 2.5 cm connections
- Depth: 12 cm
- Weight of heater without accessories: 2.86 kg
Cubby box riser dimensions
- Length: 47.5 cm
- Height: 26.5 cm
- Depth: 15.5 cm
- Weight of cubby box riser incl. mounting plate: 6.5 kg
manufacturer information:
tigerexped GmbH & Co. KG
Weseler Str. 82
Alpen, 46519
NRW, DE
info@tigerexped.de
responsible person:
tigerexped GmbH & Co. KG
Weseler Str. 82
Alpen, 46519
NRW, DE
info@tigerexped.de
| Item information | Value |
|---|---|
control: |
Comfort Control Panel |
Item weight: |
11,09 kg |
All reviews: