99% Camper Kit diesel air heater installation set with Autoterm Air 2D
This kit is called that because it fits 99% of all “standard” camper setups. It includes everything you need to complete your diesel air heater installation – including air outlets for furniture, control unit, warm air ducting, and more.
Key benefits at a glance
- Includes everything you need to complete the heater installation
- Autoterm Air 2D with 2 kW heating output and altitude kit
- Also suitable for larger expedition vehicles up to approx. 16 cubic metres of heated volume
- Control panel, warm air ducting, Y-piece and 2 outlets already included
- Mounting flange, fuel supply and complete installation kit included
- Fits 99% of camper setups
The kit with a 2 kW heater also works for larger expedition vehicles with up to approx. 16 cubic metres of heatable volume (volume without furniture). The heater is best used in continuous operation. This means it is not switched off, but simply runs continuously at a low output level. The reason is simple: it requires significantly less energy to maintain a temperature than to heat up an ice-cold interior within 30 minutes.
We assume that the vehicle is properly insulated and that – due to the large, uninsulated windows – the cold driver’s cab is separated in winter, at least with a blanket.
No worries: the heater is designed for continuous operation and handles this without any issues. In principle, you can switch it on when you leave and turn it off again when you return home 4 weeks later. Power consumption at the lowest setting is 10 watts – less than your van’s parking lights.
The heating output of the 99% kit may not be sufficient if:
- you enjoy winter travel and frequently drive a large vehicle in extreme cold conditions
- your vehicle is poorly insulated but you don’t only travel in summer
- you need to heat more than 16 cubic metres of space
For these cases, there is the 1% Camper Kit with 4 kW heating output, or even better: the TWIN Kit.
If you are unsure about the required heating output, take a look at our magazine article TWIN Kit – all-in-one solution for heater sizing, where we cover this topic in more detail (only available in German, we kindly ask to use your browsers translation).
For the VW T5 / T6, the installation location for an underfloor air heater is already prepared from the factory. We also offer a matching installation kit: T5/T6 kit.
The heater:
Diesel air heater Autoterm Air 2D with 2 kW heating output and altitude kit. Suitable for vehicles with 12V or 24V on-board electrical systems (please select according to your vehicle).
This heater has proven itself for many years even under the harshest conditions and stands out due to:
- robustness,
- easy repairability,
- E-mark certification (no TÜV approval required and no specialist workshop needed),
- warranty retention when self-installing,
- altitude kit and more.
You can find the full product description here: View Autoterm Air 2D
Select the outlet type:
The heater is available with two different warm air outlets for different installation situations, which you can select above.
Straight outlet:
Please note that the warm air must be routed away from the heater in as straight a line as possible. The duct should only have gentle bends and must not form a 90° angle or similar directly behind the heater. Otherwise, heat can build up and cause the heater to shut down for safety reasons.
90° outlet:
Here, the warm air is routed through a specially flow-optimised 90° outlet. The outlet can be mounted upwards or sideways. With this version, it is particularly important to ensure straight ducting from the heater outlet. The maximum duct length must not exceed 3–4 m.
Important: Even though the heaters themselves are identical: if you use warm air ducting with the straight version to create an angled outlet like the compact housing version, your heater will overheat. Plan your installation carefully before ordering so you know whether the straight or angled outlet is the better choice for your setup.
Altitude kit
The heater is equipped with an altitude kit, meaning it automatically adjusts to changing air pressure conditions at higher altitudes. However, this does not prevent soot build-up. When leaving high altitudes, run the heater at full power for one hour to burn off deposits.
This burn-off is also necessary if you operate the heater at low output for long periods. At least every 1–2 weeks, run it at full power so the combustion chamber reaches high temperature again. This is the most important – and effectively the only – maintenance required.
Technical data
- Operating voltage: 12V or 24V
- Heating output: 0.8 kW (min), 2 kW (max)
- Airflow: 34 m³/h (min), 86 m³/h (max)
- Fuel consumption: 0.10 l/h (min), 0.24 l/h (max)
- Power consumption: 10W (min), 29W (max)
- Warm air ducting: 60 mm system
Also included: complete installation kit
- low-noise Autoterm fuel pump (“extra quiet”)
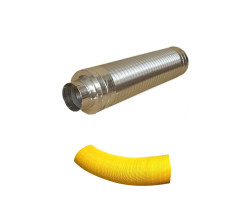
- stainless steel exhaust silencer (17 x 9 x 5 cm)
- rubber mounting for dosing pump
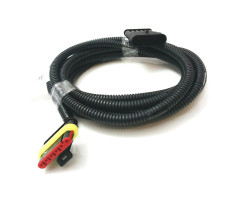
- wiring harness for dosing pump
- wiring harness for heater
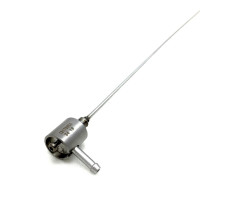
- intake air hose with integrated silencer
- heat protection sleeve
- exhaust pipe end piece + clamp
- fuel pickup pipe
- 5.5 m fuel line
- fuel line connectors
- 1 m metal corrugated exhaust pipe
- screws, nuts, clamps, heat shrink tubing, cable ties
- user manual
Control and user interfaces
A control panel is included with the heater (please select your preferred version). You can choose between the following options:
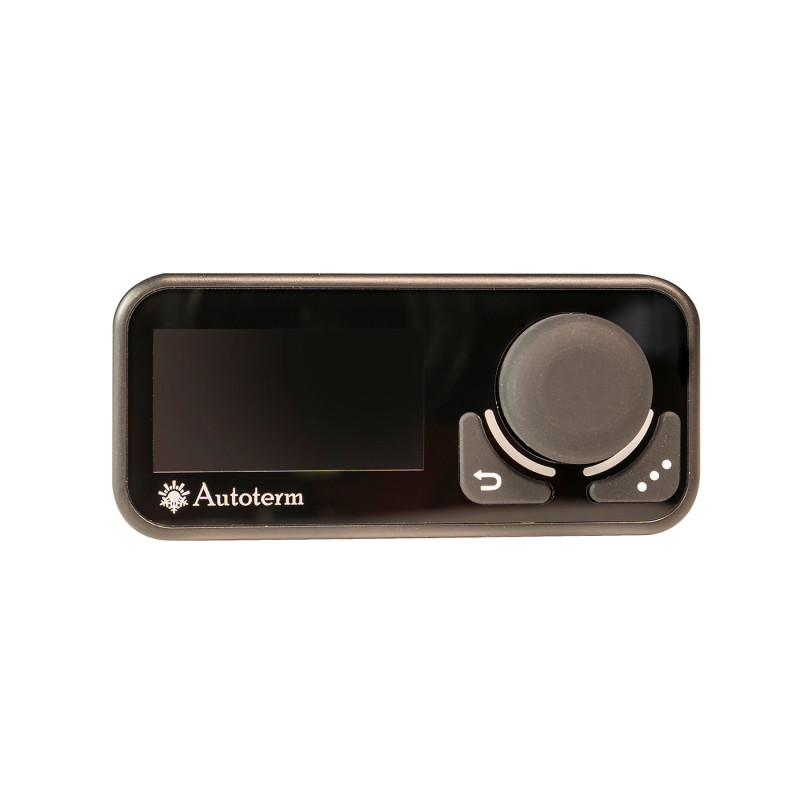
Comfort Control
Control unit with multifunction rotary knob and display: easy operation, timer function, voltage display and thermostat mode – a proven all-rounder with additional burn-off reminder and voltage monitoring that can actively switch off the heater to protect the battery.
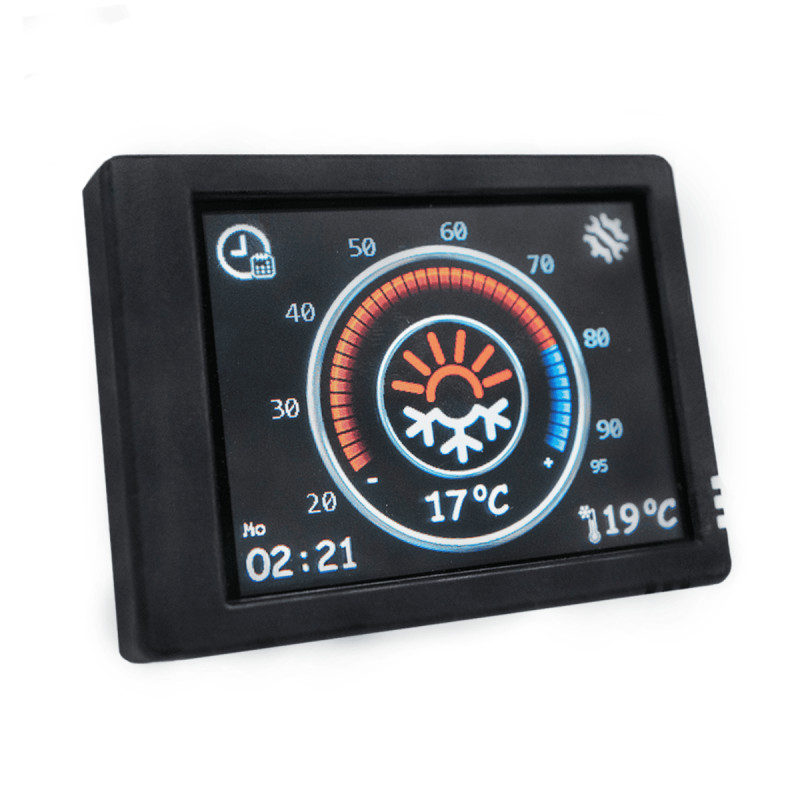
Touch Control
Modern touch control panel with clear menu structure. Ideal if you prefer a particularly comfortable and intuitive user experience and want to keep an eye on all values.
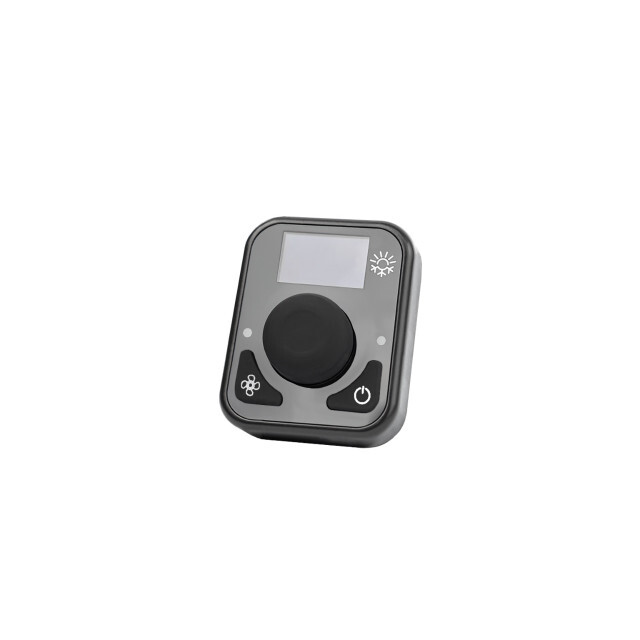
Mini Control
The Mini Control is a simple control panel for adjusting power levels. Using temperature mode requires an optional external temperature sensor.
Tip: optionally available Push Control
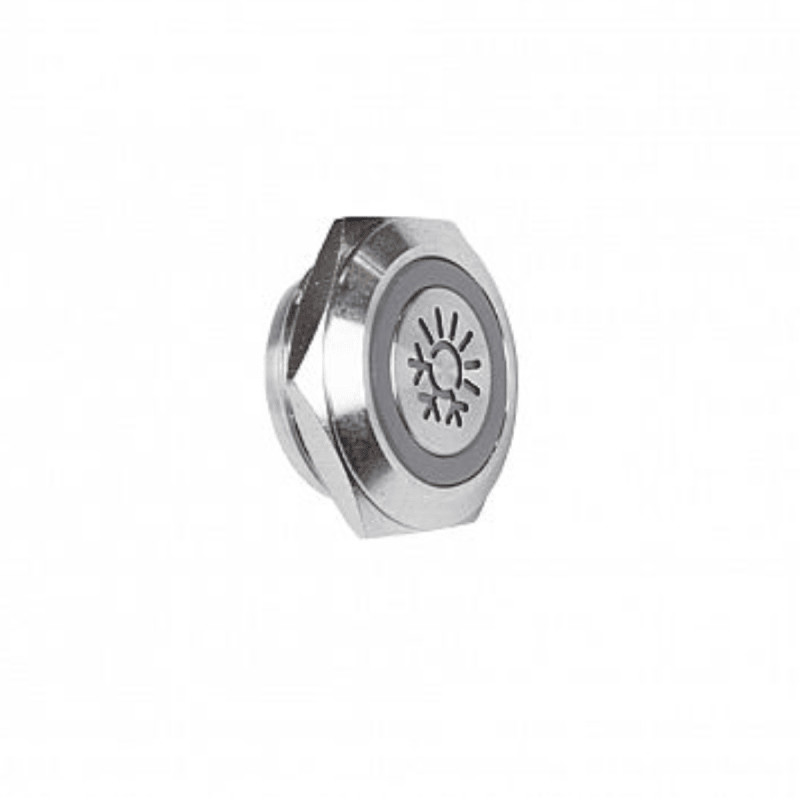
Since 2025, two control units can be operated simultaneously on one heater – for example one in the living area and one in the driver’s cab or sleeping area.
The Push Control is a compact, robust button for quick everyday operation (on/off and power levels). It can be combined with the Comfort Control or used on its own for minimal control requirements.
Compare control panels directly
A detailed comparison can be found in our magazine:
Autoterm control panels compared – functions, differences and recommendations.
Available in German only, we kindly ask to use your browsers translation.
Optional: extension cable
The supplied cable length for the control panels is 1.80 m. Longer cables or extensions can be found in our diesel air heater accessories.
Mounting flange
A stainless steel mounting flange, which simplifies installation and provides thermal decoupling, is also included.
Cutting a rectangular hole (9 cm x 13 cm) in the vehicle floor is sufficient to mount the heater level and thermally decoupled. The tigerexped mounting flange can then be bonded or screwed in place (please use a PUR sealant, not silicone).
The size of the flange can be selected: for floor thicknesses up to 48 mm (suitable for most vans) or for 83 mm (typically for cabins or heavily insulated floors). The flange should be at least 5 mm longer than the floor thickness (for the sealing joint).
Fuel supply
Two different T-pieces (8 x 8 x 5.3 mm and 5.3 x 5.3 x 5.3 mm) are also included, for example if an auxiliary heater is already installed and fuel can be tapped easily. We only recommend modifying the vehicle’s fuel system if you are familiar with it and can ensure proper operation.
Alternatively, the kit also includes a diesel pickup pipe for drawing fuel directly from the tank.
Fuel hose note:
Fuel hose is included as line connectors. The supplied length is usually sufficient (you may need to shorten or divide sections). If required, additional hose can be ordered by the metre under item number 35612.
Warm air ducting
The kit also includes 3 metres of 60 mm warm air ducting. In 99% of cases, this is sufficient.
Air outlets / distribution
A matching Y-piece and 2 adjustable 60 mm outlets are also included, which you can install in furniture or walls as required.
Frequently asked: What is the difference between this and the Warmduscher kit?
A Warmduscher kit includes not only a heater but also a hot water boiler. However, it is not simply a 99% camper kit with a boiler – the scope of supply differs in other aspects as well. A direct comparison can be found here: 99% Camper Kit vs. Warmduscher Kit – what you get (available in German, please use yor browsers translation).
Videos
Hot water planned?

If you want to install a hot water system in your camper in addition to a heater:
Autoterm heaters are available in combination with a hot water boiler and a special control unit for full system integration.
More information here:
manufacturer information:
tigerexped GmbH & Co. KG
Weseler Str. 82
Alpen, 46519
NRW, DE
info@tigerexped.de
responsible person:
tigerexped GmbH & Co. KG
Weseler Str. 82
Alpen, 46519
NRW, DE
info@tigerexped.de

| Item information | Value |
|---|---|
max. power: |
2kW |
Voltage: |
12V24V |
control: |
Comfort Control Panel |
All reviews: